
Sometimes admin needs to change the default storage location for a tenant. Cluster admin can create storage migration task, to migrate the backend storage to a new location.
Before the migration
Make sure there are not running tasks on any devices with users in the tenant, during the migration. In the process, user can still access the cloud data. However, user should not upload anything before the migration finishes.
In worse case, admin can disable the tenant, to block any access on the tenant.
To disable the tenant, as cluster admin, go to Tenant Manager. View the tenant is list detail view and uncheck 'Active' flag.
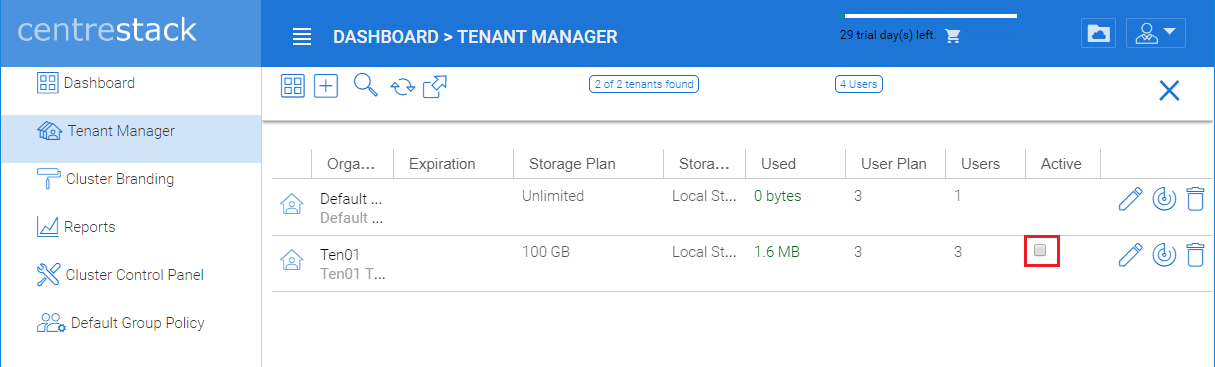
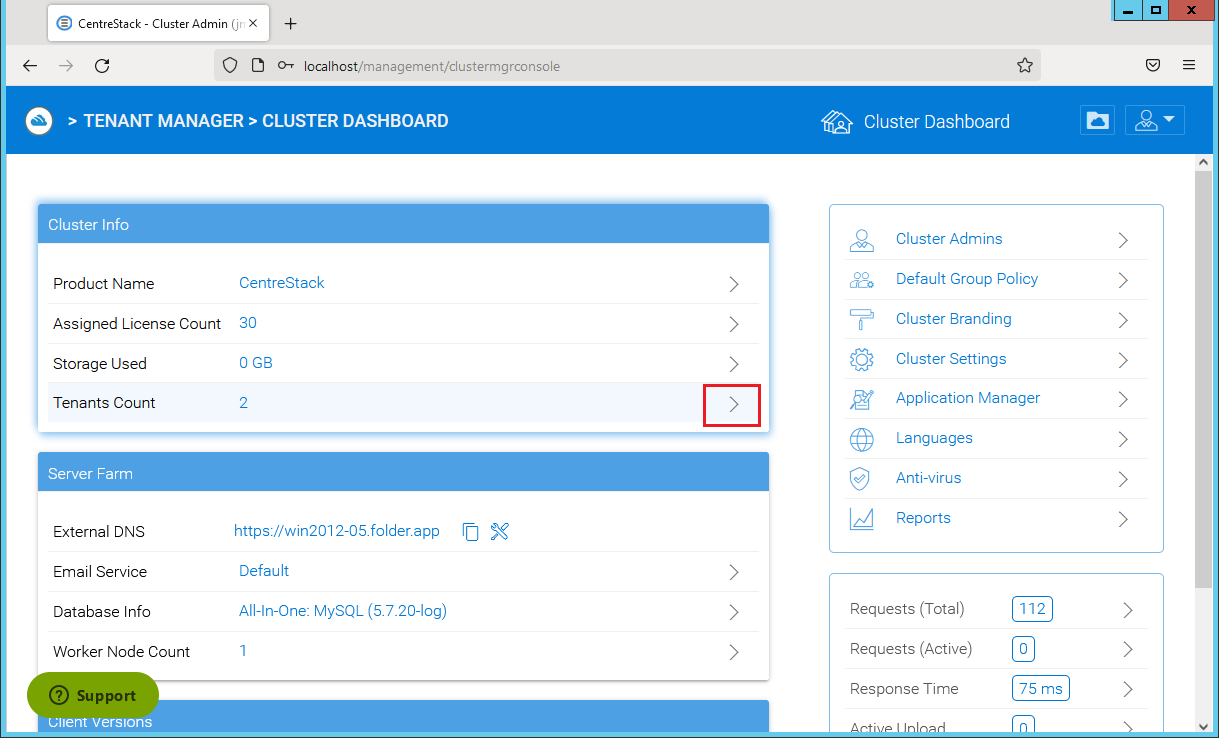
In Centrestack build 12.12.570.53288 or later, the Tenant Manager is under Cluster Dashboard.
After the migration is done, check 'Active' to enable the tenant.
Migrate data to the new location:
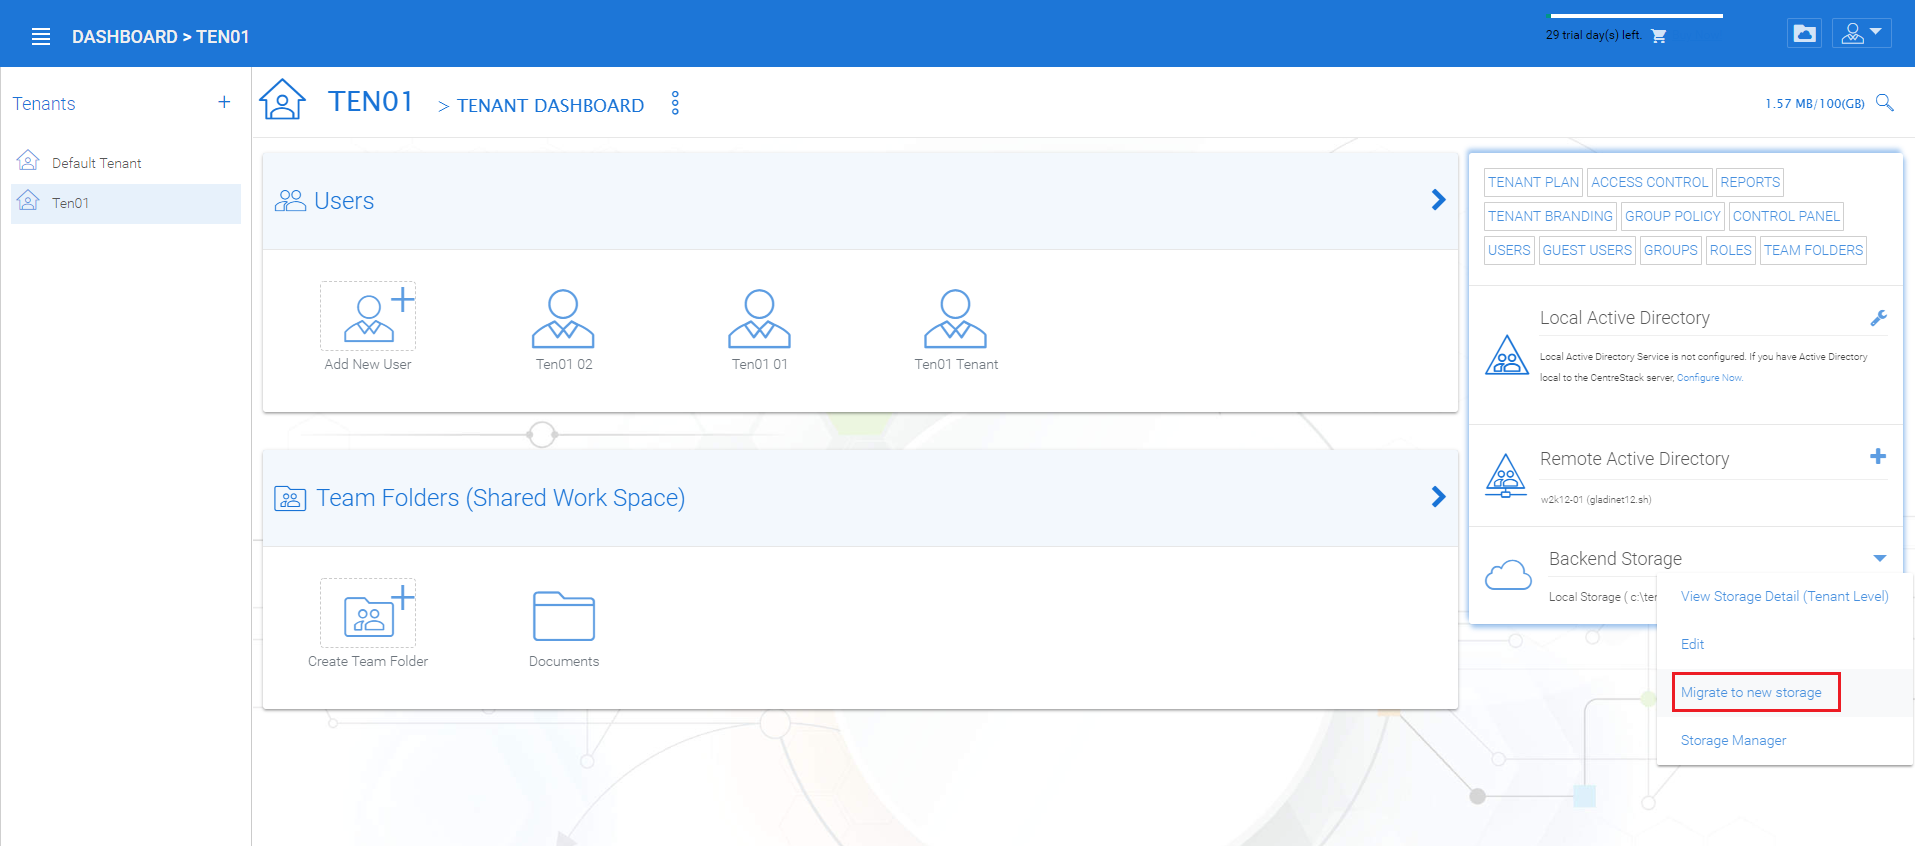
- As Cluster Admin, edit the tenant
- On Dashboard, under Backend Storage, click the drop down menu and select 'Migrate to new storage'
 In Centrestack build 12.12.570.53288 or later, to access the storage migration, from Tenant Dashboard, click Storage under Tenant Info.
  Here, click the drop down menu on Backend Storage, on top right corner.
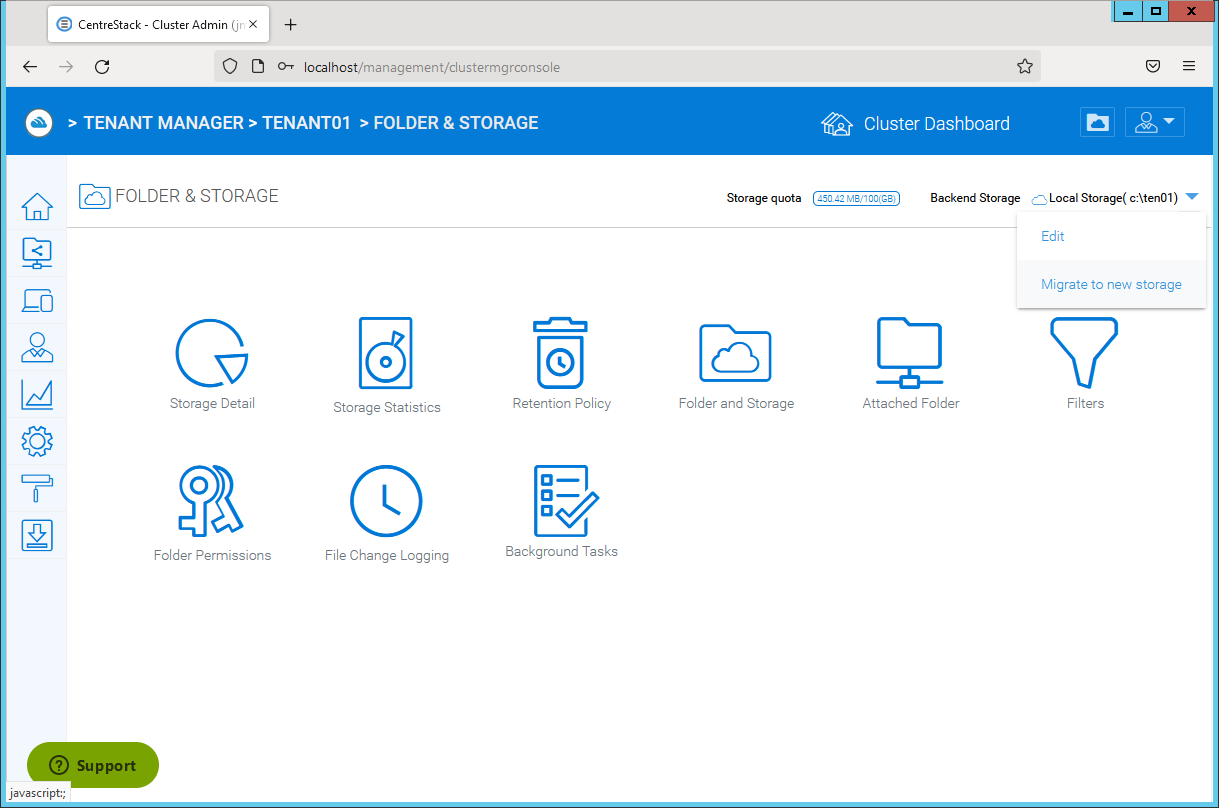
- Follow the wizard to configure the new backend storage for the tenant.
- In the migration summary, verify the current and new storage
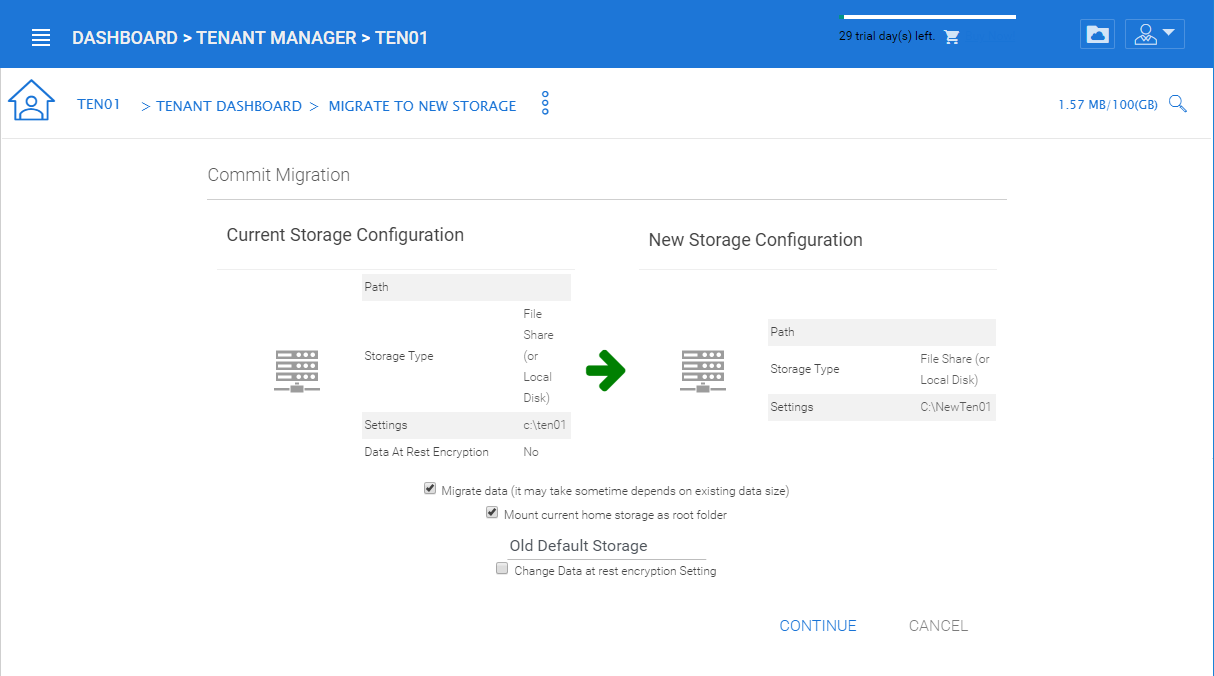
- Migrate data: When checked, the migration task will copy the data to the new location
- Mount current home storage as root folder: When checked, after migration, the current home storage (old storage) will be converted to an attached cloud storage, for the tenant admin. Tenant admin can still access the old data, just in case. By default, the storage is attached as 'Old Default Storage'. Can choose a different name
- Change Data at rest encryption Setting: Cluster admin can choose to change the Data at rest encryption (DARE) settings. Without change, it will remain the old DARE configuration for the tenant. Can choose to disable DARE, or setup DARE with a new password
- Click Continue to create the migration task and start run.
After the migration
- If you disabled the Tenant, enable the Tenant now.
- Login to the web portal, upload a test file. Verify the file is uploaded to the new location.
Comments
4 comments
When executing this instruction by moving the data to a path wtih the exact same length as the original path, (ie: c:\CentreStack moving to e:\CentreStack), I've received "Destination Path Too Long" and have to either cancel or skip the file(s). The prompt occurs when executing the file copy (move) within Windows Explorer. Is there a solution to this issue?
Hi, you can also try “Long Path Tool” it really works for me. It is free and easy to utilize.
When executing this instruction by moving the data to a path wtih the exact same length as the original path, (ie: c:\CentreStack moving to e:\CentreStack), I've received "Destination Path Too Long" and have to either cancel or skip the file(s). The prompt occurs when executing the file copy (move) within Windows Explorer. Is there a solution to this issue? Amazon bin shopping locations near me
When executing this instruction by moving the data to a path wtih the exact same length as the original path, (ie: c:\CentreStack moving to e:\CentreStack), I've received "Destination Path Too Long" and have to either cancel or skip the file(s). The prompt occurs when executing the file copy (move) within Windows Explorer. Is there a solution to this issue? https://deltaexecuters.com/
Please sign in to leave a comment.