
The process of purchasing and installing a certificate is usually made up of 5 steps:
Step 1 - Purchase an SSL certificate
You can purchase an SSL certificate for the domain name that you want to use for external access to CentreStack from any vendor on the internet. However, it is recommended that you buy a wildcard certificate, or at least a multi-domain certificate if you plan on scaling CentreStack out horizontally (by adding more server nodes) in the future.
Wildcard certificates cost more money, but they allow you to secure an unlimited amount of sub-domains without having to re-key the certificate each time you add a new one (ie: *.example.com). Multi-domain certificates, on the other hand, are much cheaper and even allow for different domains to be used (not just sub-domains), but they are usually limited to about 5 to 10 variations (via "certificate subject alt names").
Once you've purchased your SSL certificate, go to the administration interface to manage it and then find the place where you can paste a CSR request. Each vendor is different, but the process is roughly the same on all of them.
Step 2 - Generate a Certificate Signing Request (CSR) from the CentreStack server
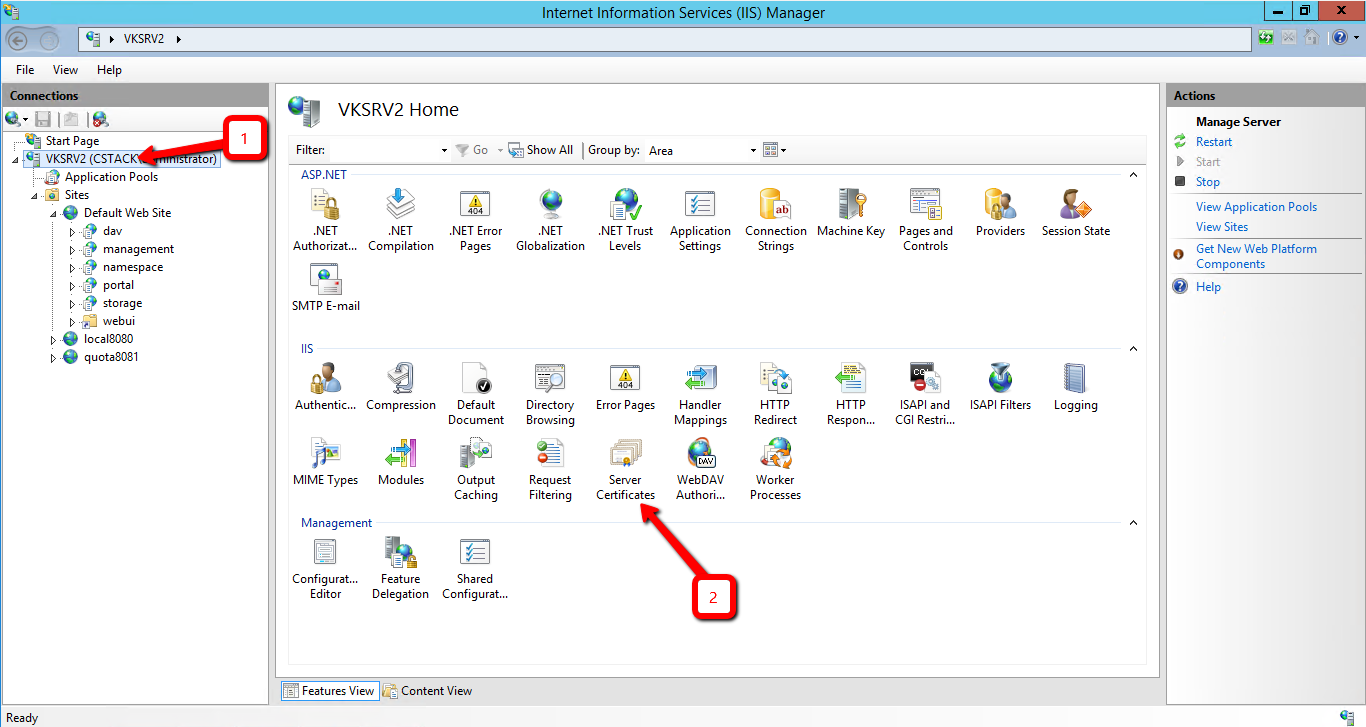
Now go to the CentreStack server and open Internet Information Services (IIS) by typing Windows Key + R, then "inetmgr" (without quotes). Once the IIS interface opens, click on the server name from the left-panel, then choose the Server Certificates icon.
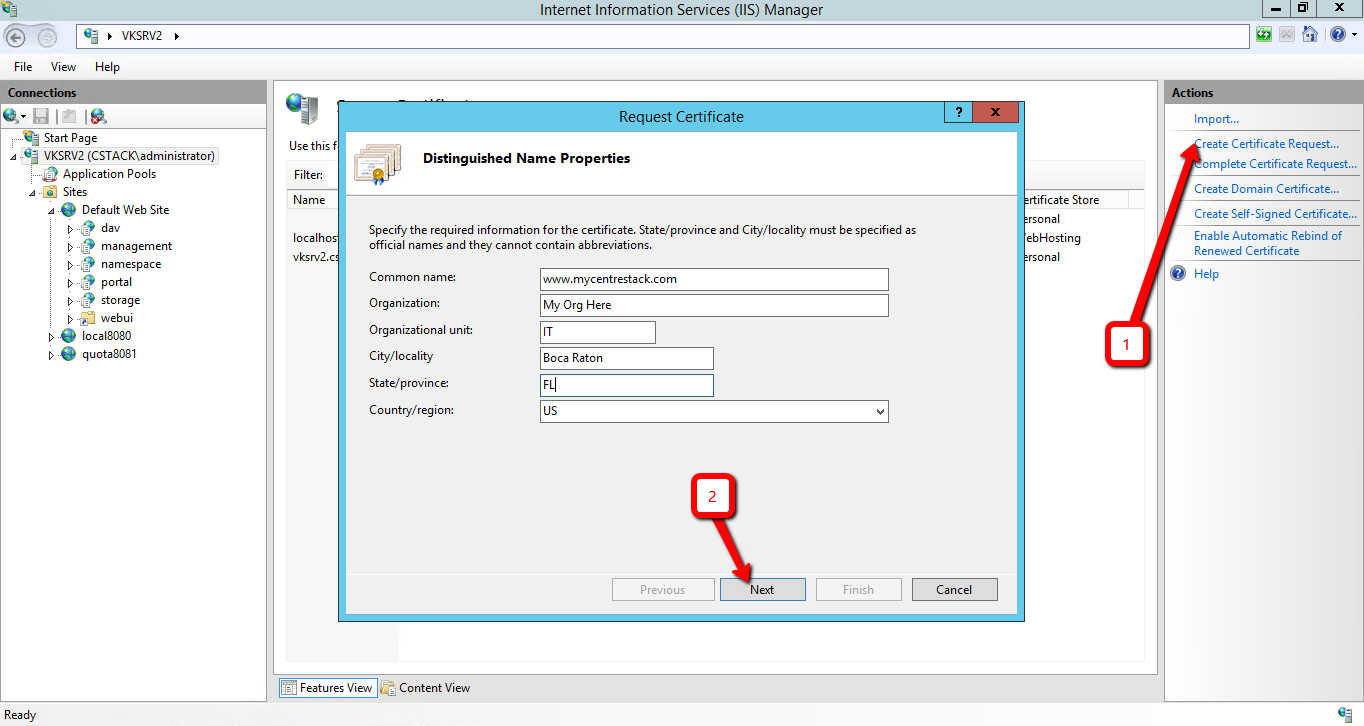
Click on the Create Certificate Request link button from the right-side panel of IIS. Fill out the information for your SSL certificate. Make sure the Common Name matches the domain name that you purchased the SSL certificate for.
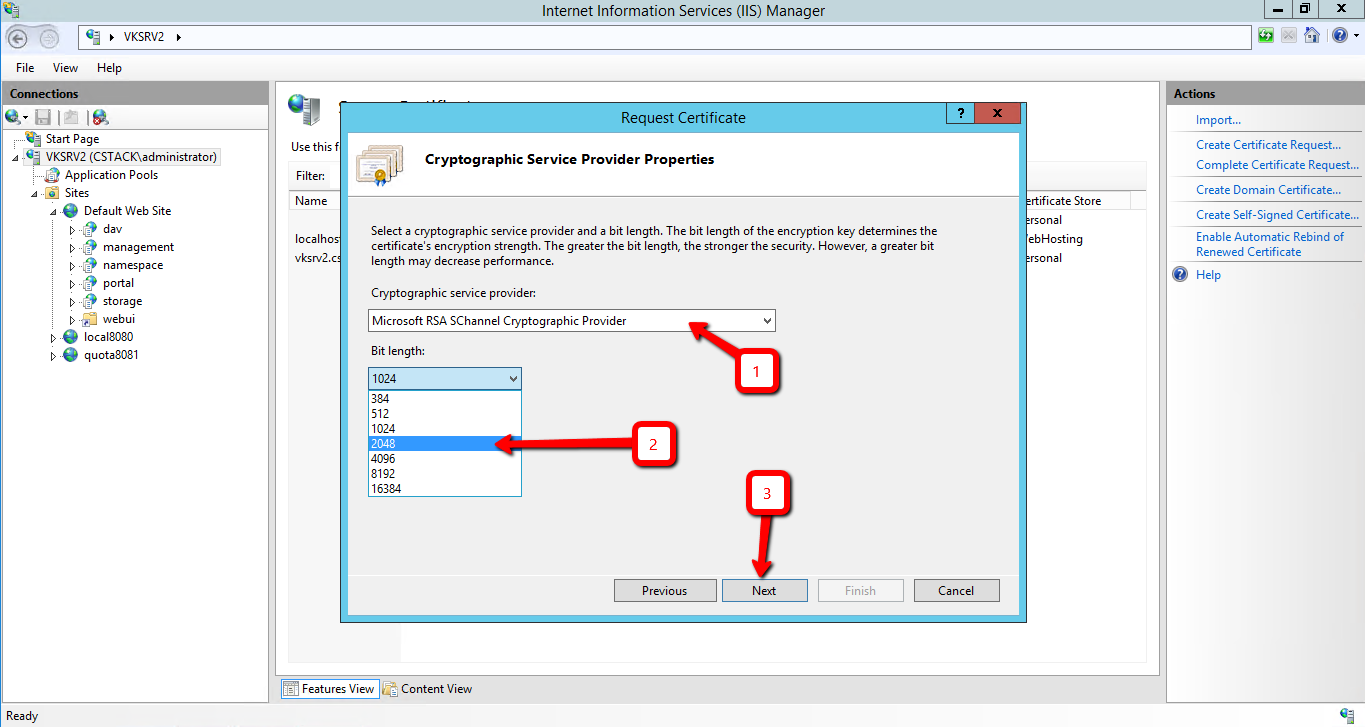
For the Cryptographic Service Provider, you will want to choose Microsoft RSA SChannel Cryptographic Provider with a Bit Length of 2048, unless specified differently by your SSL vendor.
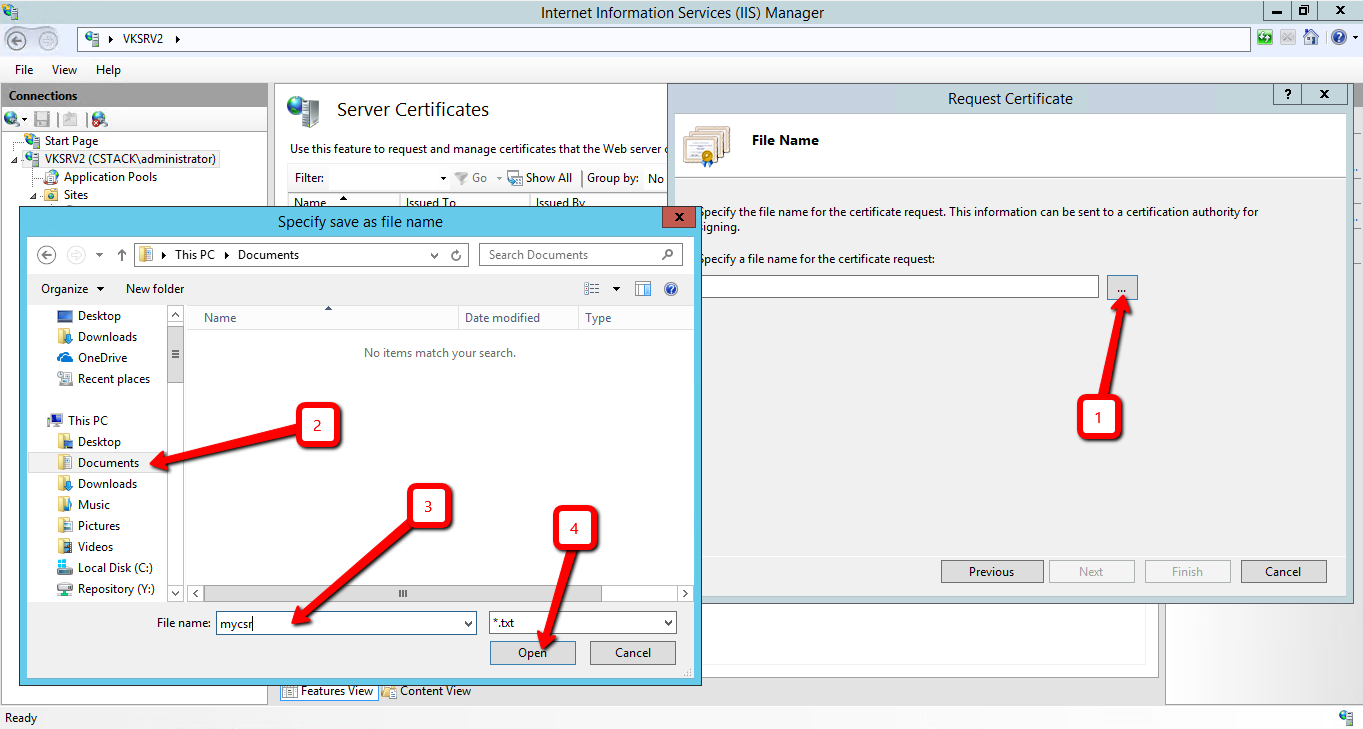
On the next screen, choose a location where you want to save the CSR file.
Once you finish the wizard, open the file with notepad and copy the entire text block (including the BEGIN and END lines).

Step 3 - Verify your Identity
Now return to the SSL vendor website and paste the text on the CSR text box of the SSL certificate that you purchased. At this point, most SSL vendors require that you verify your identity as the owner of the domain that you purchased the SSL certificate for. Some vendors will query your DNS and send a confirmation email to the technical or administrative contact that is visible on your WHOIS record. Other websites will just let you choose a generic email box to send the confirmation email to (example: admin or webmaster@yourdomain.com). In either case, you will need to make sure that the email box exists, and that you have access to the email box before you proceed to the next step.
Also during this stage (but prior to the verification), is where you enter the Certificate Subject Alternative Names if you purchased a multi-domain SSL certificate.
Once you receive the email from the SSL vendor and have clicked on the confirmation link, you will be given a link where you can download your certificate from. The link will usually be a zip package containing a certificate file and an Intermediate Certification Authority file. Upload this zip package to the server.
Step 4 - Complete the CSR process on the CentreStack server
Return to IIS and click on the Complete Certificate Request link from the right-side panel. Select the certificate file from the unzipped package. The Friendly Name field is for you to categorize your certificate within IIS and the MMC certificate Snap-In.

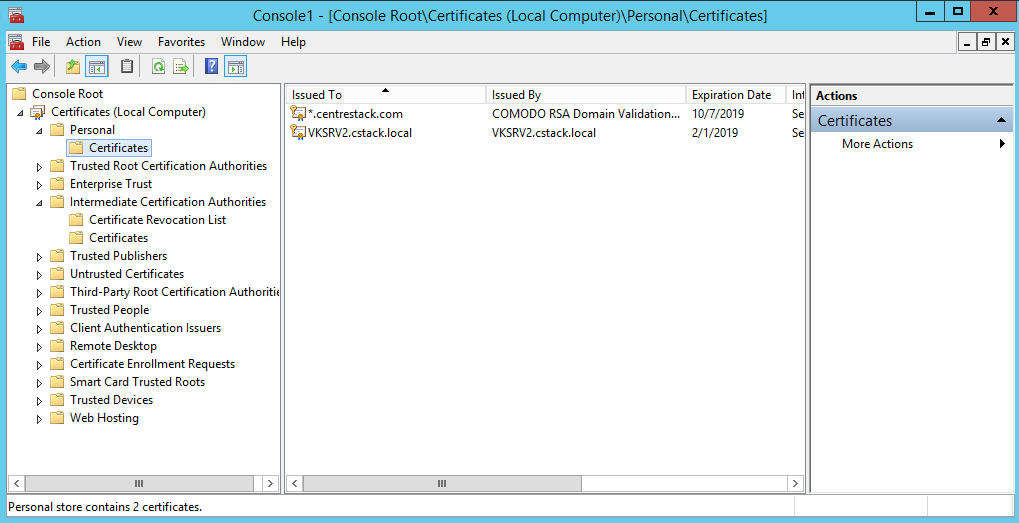
The zip package will also contain an Intermediate Certification Authority file, but you will only have to install this once on the server (if it is not already present). You can manage both your installed certificates and intermediate certification authorities from the Certificates MMC Snap-In. Just type Windows Key + R, then "mmc" (without quotes). Then, from the console's interface, choose File->Add/Remove Snap In... Choose Certificates->Computer Account->Local Computer...->Finish->OK button.
Step 5 - Assign the certificate to the website
For the final step, click on the Default Web Site in IIS, then click on the Bindings link button on the right-side panel. Edit the 443 instance by giving it a host name, then select the friendly name of the SSL certificate from the drop-down menu. Click the OK button to finish.

Comments
0 comments
Article is closed for comments.