
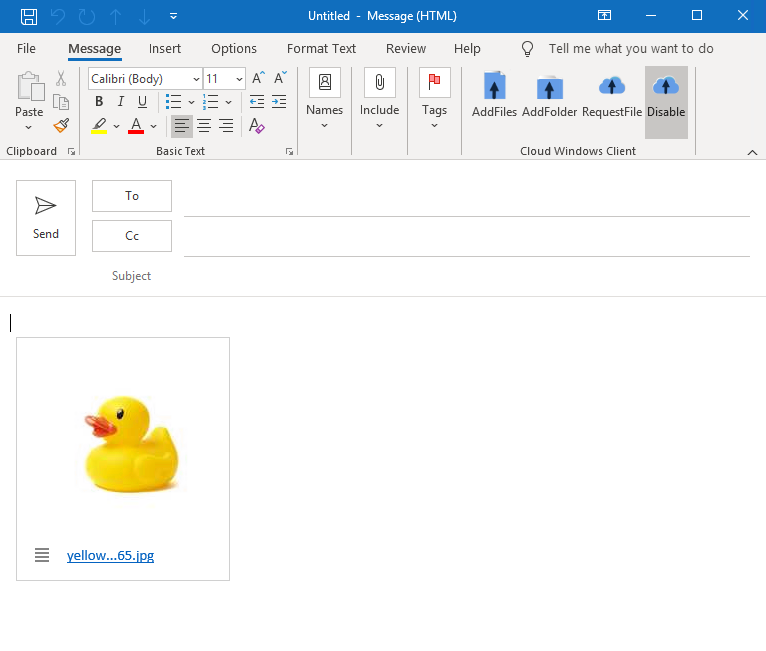
You can enable the installation of an Outlook Add-in that allows you to add "public links" to your cloud files on your emails. With this add-in, you can send individual files or entire folders to any recipient without having to physically attach the objects to your emails. You can also send request links, so users can upload large files to you.

After adding a file to the email, the add-in automatically embeds a preview of the file in the body of the email with a link to the file on the cloud.
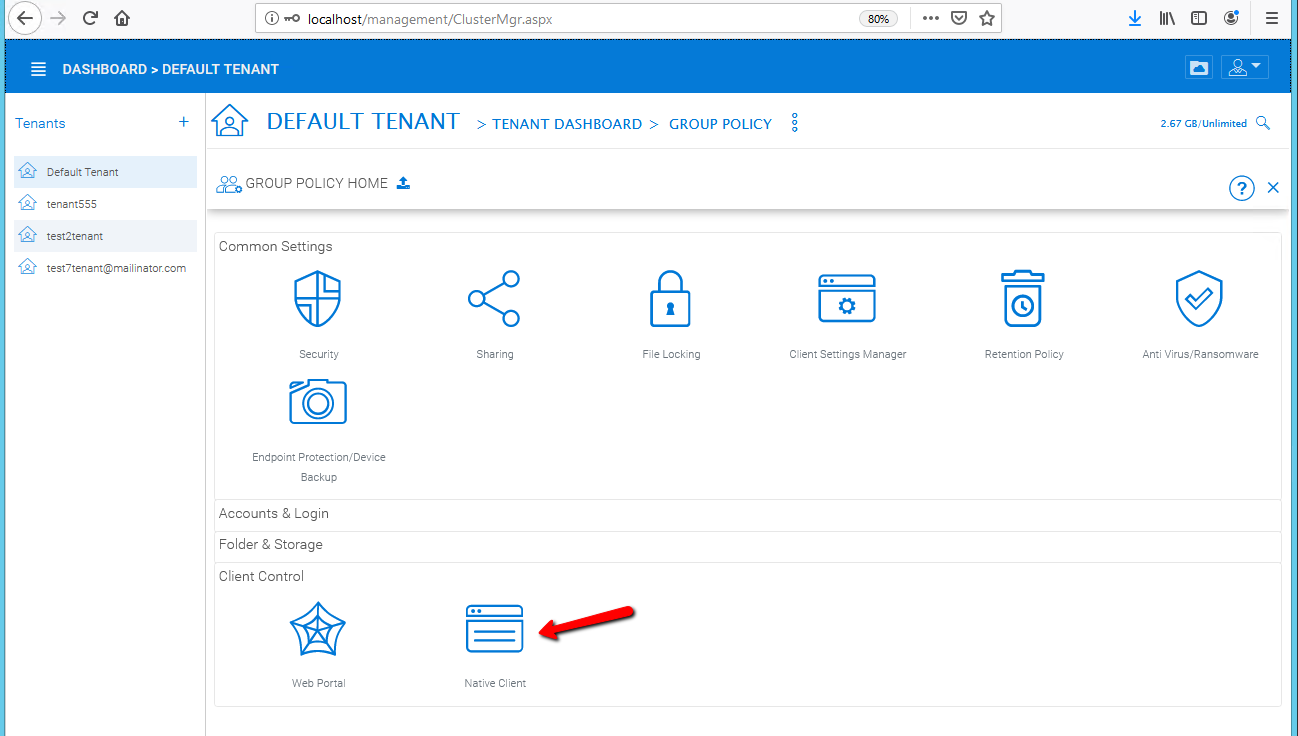
You can enforce the installation of this add-in from the Tenant Group Policy->Client Control->Native Client->Enable auto-installation of the Outlook Plugin.
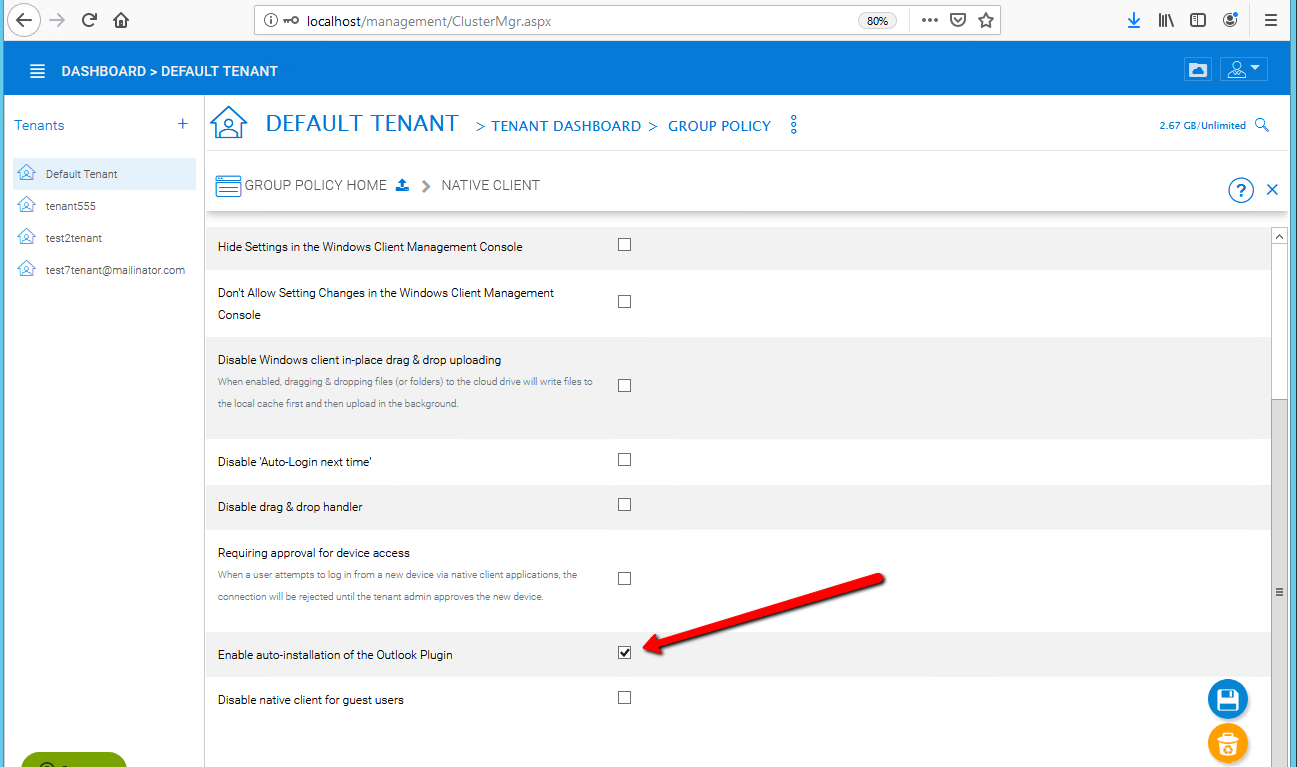
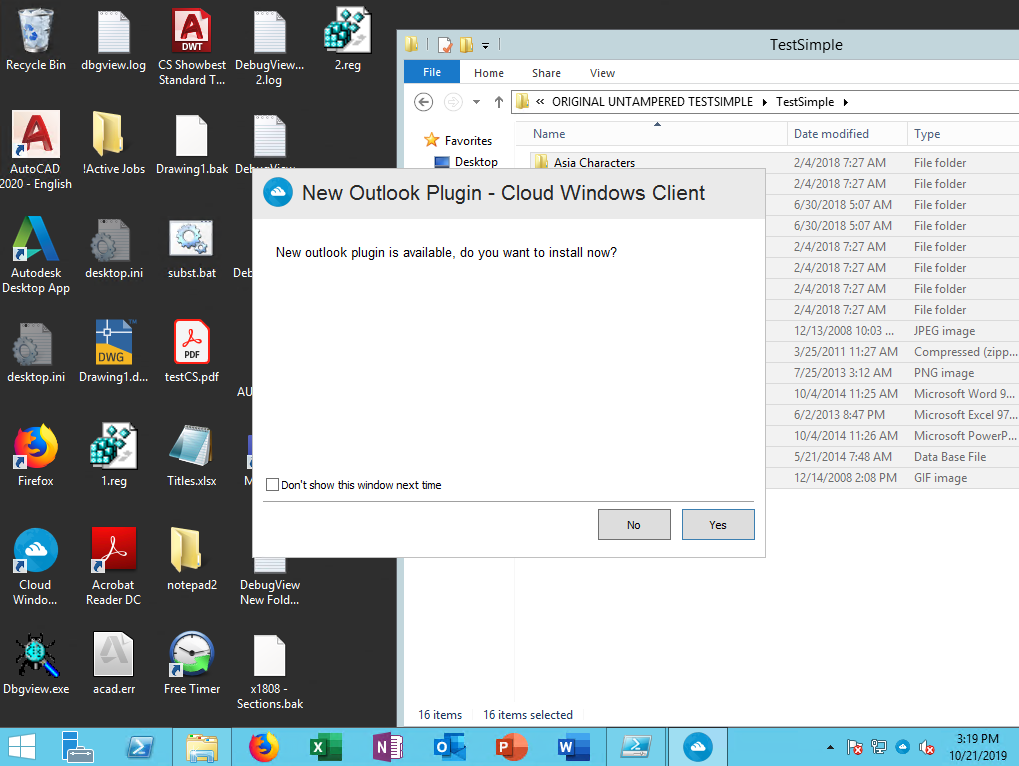
Once you select this checkbox and save the changes, your windows client users should get a prompt to install the Outlook plugin the next time they start the windows client application.
If the prompt never appears, it is probably because you are running the incorrect version of the Outlook Addin for your Microsoft Office. The Windows Client Outlook Add-in is offered in both 32 and 64 bit versions, but the auto-installer may get confused and try to auto-install one with the incorrect bitness. The default installation for Microsoft Office 365 is 32 bit to ensure the greatest compatibility with 3rd party add-ins. However, some users may have explicitly installed the 64 bit Microsoft Office.
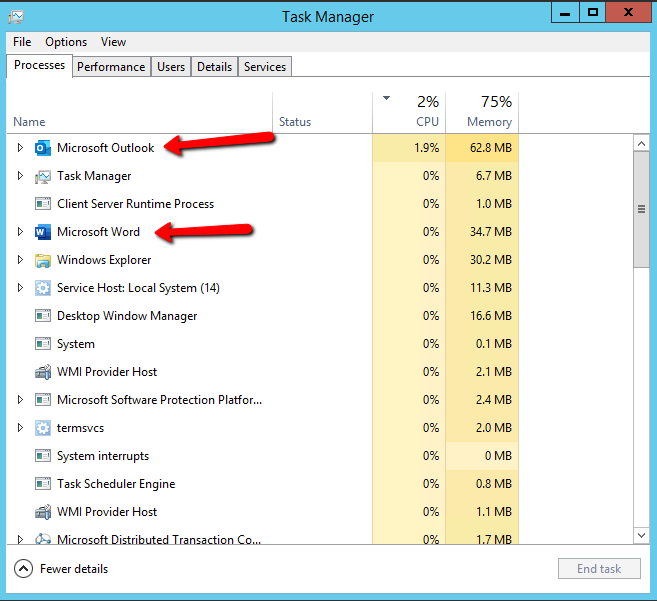
One simple way to determine the bitness of your Microsoft Office installation is to simply run one of applications, such as Outlook or Word, and look at the process name in under the Windows Task Manager. If the name of the application has " (32 bit)" at the end of it, then you are running the 32 bit version. In the screenshot below, you do not see the " (32 bit)" tag, so it is a 64 bit version.
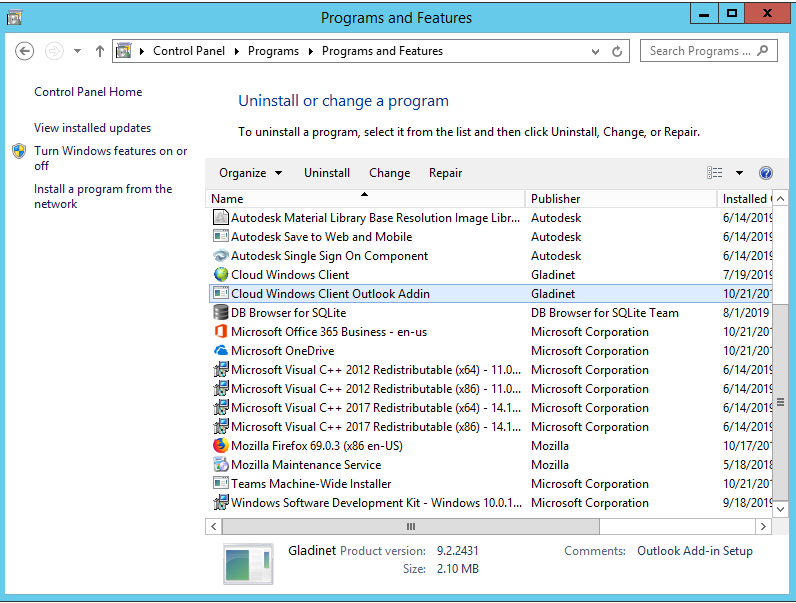
Please check your Windows Control Panel->Programs and Features and make sure the "Cloud Windows Client Outlook Addin" only appears there once. If you see it listed twice and the add-in is still not working, please uninstall both items and install the correct one to be sure. The installer may install both the 32 and 64 bit versions if it cannot determine which one it should install.
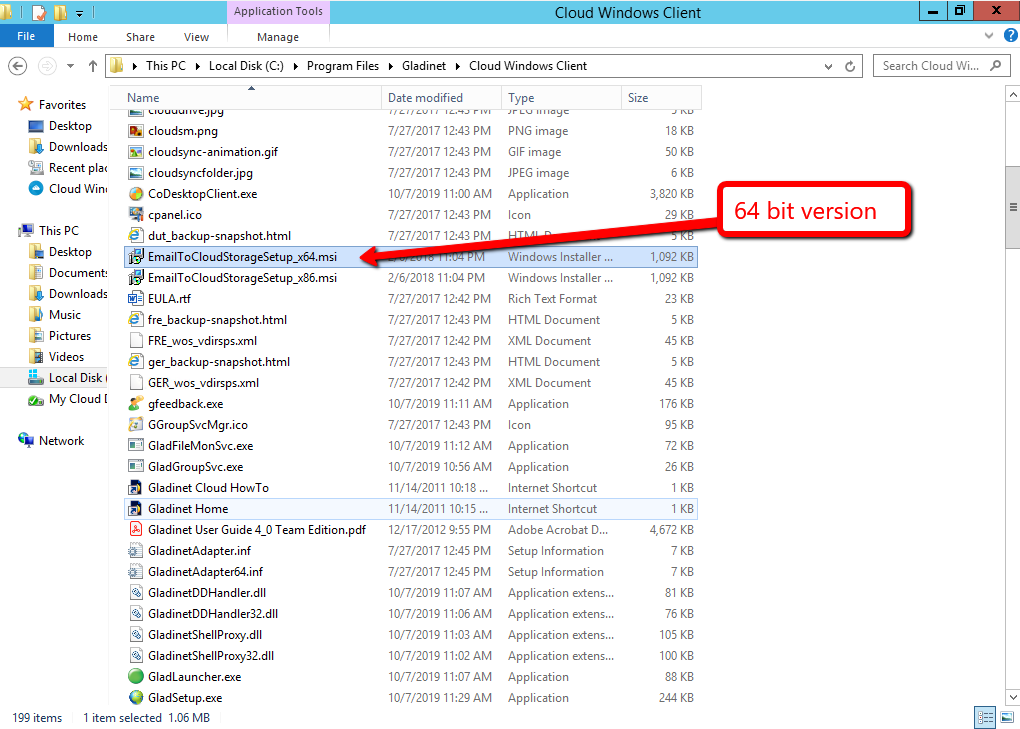
After confirming that the bitness of your Microsoft Office from the Windows Task Manager described above, you can then manually trigger the Outlook Add-in installer from the Windows Client installation directory. The file is called "EmailToCloudStorageSetup_x86.msi" or "EmailToCloudStorageSetup_x64.msi" for 32 bit and 64 bit respectively.
After having ran the installation wizard, please restart both the Windows Client and the Outlook application. Verify that the Outlook Add-in is present when you try to compose or reply to an email. If the Add-in is missing, please verify that the Add-in is not disabled under File->Options->Add-ins.
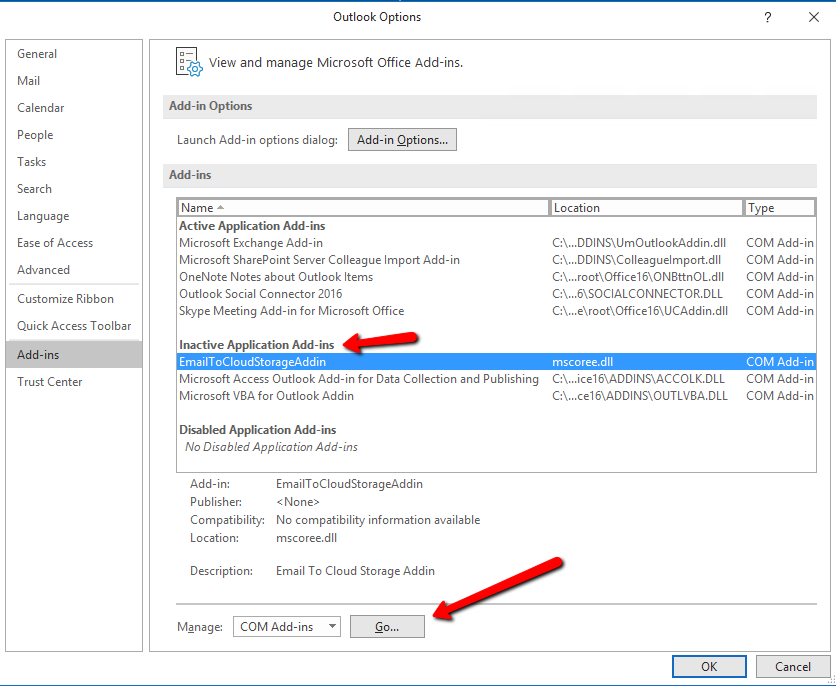
If you see "EmailToCloudStorageAddin" listed under the Inactive section, click on the Go button to manage the add-ins. Select the checkbox next to the add-in and click OK.
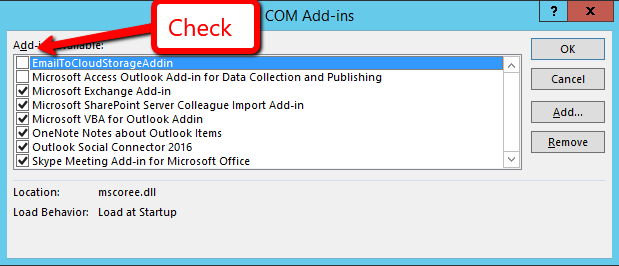
Below is a screenshot of what the EmailtoCloudStorageAddin should look like if it is successfully loaded.

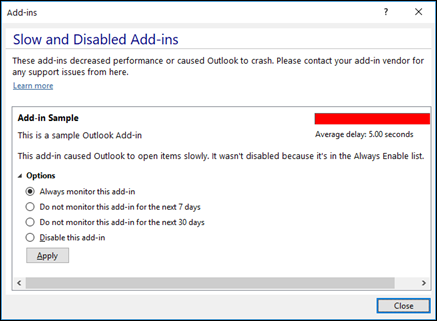
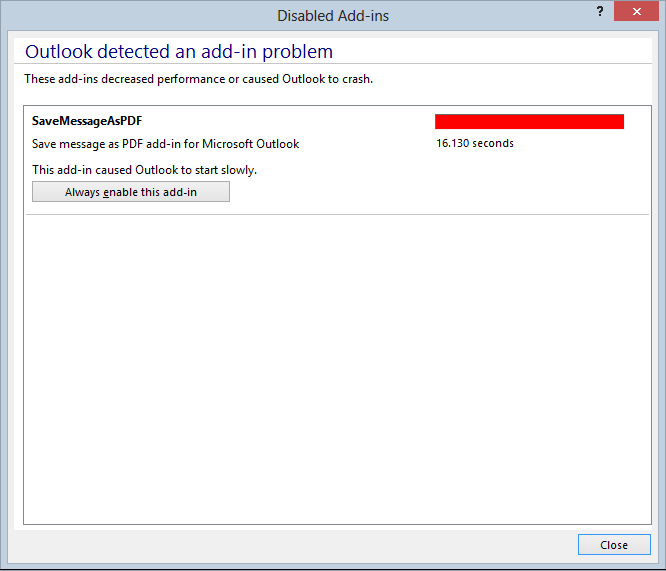
If after a successful installation the add-in one day disappears, or is automatically disabled with a yellow warning, it may be due to an Outlook mechanism that automatically disables add-ins that slow down the launch of the application. This is extremely unlikely, however if you have a computer that has very limited resources, it may happen with any add-ins that you may have, including the EmailToCloudStorageAddin. If you suspect that the add-in may have been disabled automatically, go to Outlook->File->Slow and Disabled Add-ins. If you see an option to Always enable, please select that option. The following example screenshots do not depict the EmailToCloudStorageAddin, but show what the screen looks like if this were to happen.
Additional Resources
Comments
0 comments
Article is closed for comments.